1984 - 1996 Corvette: Technical Article: Poly Performance: Putting Polyurethane Bushings on Your Late Model Corvette
Estimated Reading Time: 7 Minutes
Putting polyurethane bushings on your late-model Corvette pays off with better ride and handling
by David Fulcher aka David-F
So, you have a late-model Corvette and you want to go racing. Or maybe you just want it to feel better on those winding roads you like so much. Why not replace those mushy rubber busings with polyurethane? Making the poly switch will enhance the handling and ride characteristics of your car so much that you’ll wonder how you ever drove without them. The front and rear sway bar bushings are usually the ones people think of changing when they want to make their car handle better. For a lot of people that is enough, but if you’re looking for the most from your Corvette, there’s a lot of rubber that needs to be replaced: the front and rear sway bar bushings, front, upper and lower control arm bushings, the power steering rack mount bushings, the rear upper and lower control arm bushings, camber bar bushings and the rear end cover mount bushings. The bushings were supplied by Doug Rippie Motorsports for installation on Gary Konner’s (of Malcolm Konner Chevrolet fame) Corvette. Gary was looking for better ride and handling in his race Corvette, and decided to go the polyurethane bushing route. He contacted Doug Rippie Motorsports, and DRM supplied all the necessary parts and pieces for the job. Follow along as we show you how it was done.
First, remove the front sway bar and end links from the car by raising the front and unbolting the upper and lower sway bar end links and removing them from the car. Note: If you own a 1988 or later car and plan on changing the lower control arm bushings, do them both at the same time because changing the lower sway bar end link mounting bushing is much easier to change when the arm is off the car.
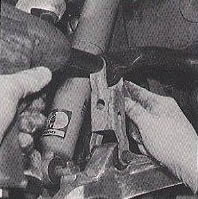
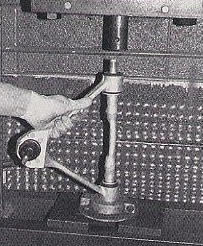
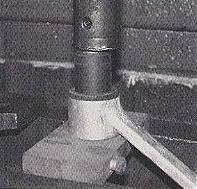
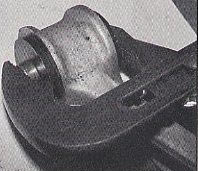
Next, remove sway bar mounting stap bolts and mounting bushing from bar and snake bar out from one side or the other. Next, remove the rubber part of the sway bar end bushing, retaining the outer steel sleeve of the original rubber bushing. You can either heat up the bushing till the rubber starts to melt, then push the bushing out or press the rubber bushing. I find using a ball joint press clamped into a vise and an appropriate sized socket works well to press the bushing.
Rear Sway Bar Mounts and Bushings
On the rear bar, you don’t have to save the outer rubber bushing sleeve. Raise the rear of the car and support it, then remove the rear wheels and tires, as well as the spare tire and both upper and lower spare tire carrier. Unbolt lower sway bar end links, bolts and sway bar mounting strap bolts and remove bar from car. Remove the sway bar end links from bar.
Then press out the sway bar end link rubber bushing and lube and press in the new polyurethane bushing. Also, press out the rubber sway end bushing.

Lubricate and press in new polyurethane bushing onto the sway bar and install the spacer. Then you can lube and install the new polyurethane sway bar mount bushing and straps. Reassemble in reverse order of the disassembly process.
Power Steering Rack Mounts
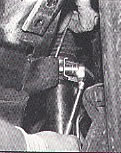
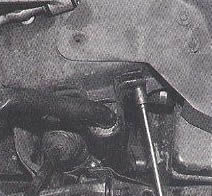
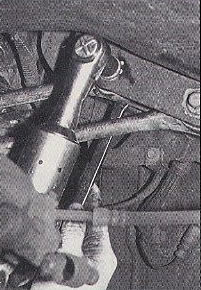
It makes no sense to take out the deflection in the car’s suspension and leave the steering rack mounted in rubber so it can weave side-to-side during hard maneuvers. So, to replace those rubber mounts, start by removing the rack, power steering lines and disconnect the steering column.
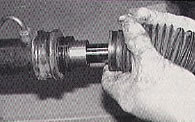
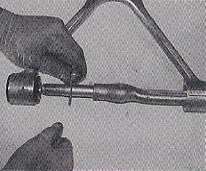
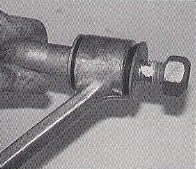
With the rack secured, cut the boot clamp and pull the boot up on the tie rod to expose the inner tie rod end.
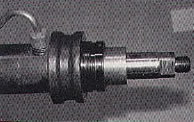
Remove the old rubber mount and install the new polyurethane mount in its place. Install a new clamp on boot and reinstall the tie rod. Stake the inner tie rod end so it won’t loosen up.

Raise the front of the car, remove the front wheels and tires and disconnect the outer tie rods from the steering knuckle. Remove the front sway bar, right side rack, hold-down strap and left side attaching bolt. Snake the rack out of the left side fo the car. To change right side mount, you have to remove the right side tie rod and boot.
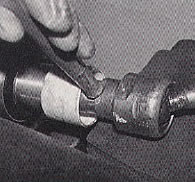
Slide the inner tie rod dampener off and unscrew the tie rod.

Install the inner tie rod dampener and boot and tighten the clamp. Then press out the left rubber and spacer and mount. Slide in the new polyurethane mounts and the new spacer. Then reinstall the steering rack in reverse order of dissassembly.

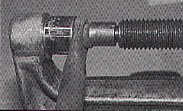
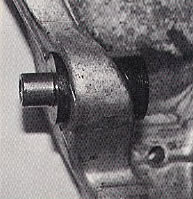
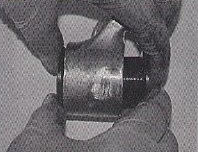
With a drenal tool or knife, clean the remaining glue and rubber from inside the steel sleeve. After the sleeve is cleaned out, use special lube on the inside of the sleeve and outside of the polyurethane bushing and slide the bushing into the sleeve. Then lube the spacer and install in the polyurethane bushing. Install the bar on car with new polyurethane mounting bushings and original straps. Don’t forget to lube the inside of bushing and bar. Replacement of the lower sway bar end link mount on 1988 or later Corvettes is much easier with the lower control arm removed, but it can be done on the car.
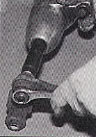
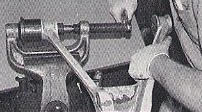
Start the bushing out with a solid rap from a hammer. Then install a socket on the bushing and knock it out the rest of the way out. Lube the polyurethane bushing and install it in the arm.
Lubricate the spacer and install it into the bushing. When that is finished, you can install the end links.
Front Upper Control Arm Bushing
Open the hood and note upper control arm alignment shim locations. It will make aligning the car much easier later on. Raise and support the car and remove the wheels and tires. Disconnect the upper ball joint from the steering knuckle. Lift up the arms and remove the upper control arm attaching bolts. Then remove the arm from the car. Support the arm and remove the cross-shaft nuts. The cross-shaft is made to press cut through the side with the smaller washer. Press the shaft through the smaller washer. Press the shaft through the bushing and shaft will force the bushing on the other side out.
Slide the shaft through and reinstall the large and small washers into the bushing.
The next step is to remove the shaft from the arm. Then press out the other bushing.
Lube the two-piece polyurethane bushing and install the side that had the larger washer (the last bushing removed). Then lubricate the spacer and isntall it in the bushing.
Lube and install the spacer; then install outer washer and nuts. Reinstall control arm in reverse order.
Front Lower Control Arm Bushings
Raise the front of the car and support with jack stands. Remove the front wheels and tires, then jack up the lower control arm (On pre-1988 cars, remove the shock and sway bar end link mounting plate. On 1988 and later, remove lower control arm shock and sway bar end link.) Disconnect the lower ball joint from the steering knuckle and lower the control arm with a jack until spring tension is off the arm. Unbolt the arm and remove from car and press out the old bushings.
Lubricate the new polyurethane bushing and install it in the arm. Then lube the spacer and install it in the bushing.
Reinstall the control arm in reverse order of disassembly.
Rear Upper and Lower Control Arms Bushings
Raise the rear of the car and remove the wheels and tires. Clamp Vise Grips on the outer part of the spring and put jack stands under the spring end. Lower the car to compress the spring and remove the spring end bolt. Raise the car to take tension off the jack stand. Support the car and unbolt the upper and lower control arms.
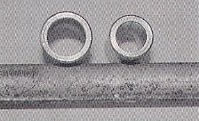
With the control arms removed, press out the old bushings. You’ll notice that there’s two different size spacers used for the bushings. The smaller spacers are used up front at the body mounts and the larger ones are on the knuckle. Again, lube the polyurethane bushings and install them in the arms.
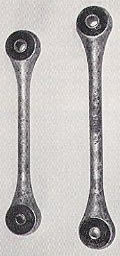
Lube the spacers and install them in the bushing. Reinstall the arms in reverse order of disassembly. Remember that the shorter arm goes on top.
The one common denominator I have found with urethane bushings never come with any type of instructions. Some parts You need to leave the original bushing shell in and put the new ones in. Some of them You have to push the entire old bushing out with the shell and install the bushings in then. As far as which is which is which, it depends on who You ask.